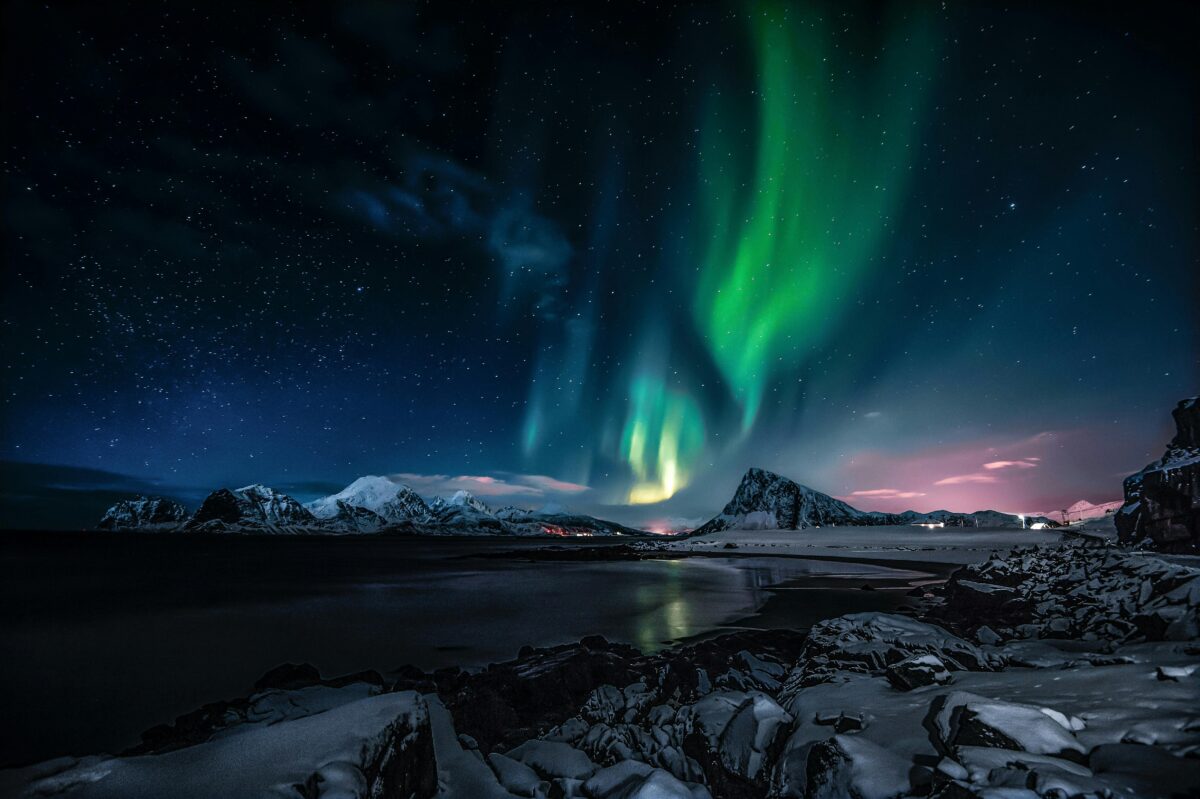
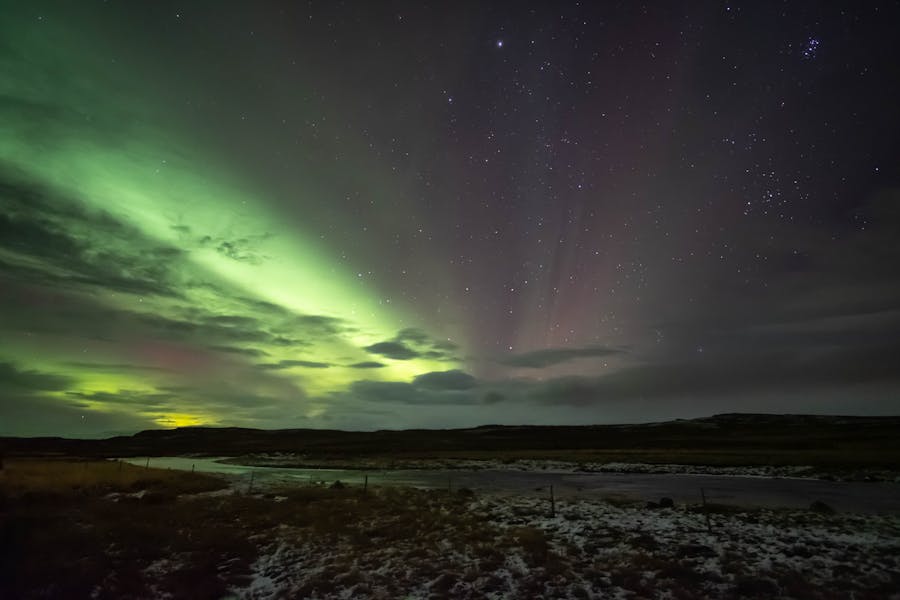
Iceland’s night landscapes really do feel otherworldly—there’s something special about capturing the Aurora Borealis or a glacier sparkling under starlight. If you’re planning a night photography trip here, you’ll want to prep carefully to give yourself the best shot at those magical moments. Honestly, the best window for night photography in Iceland runs from September to April, when darkness stretches long enough for you to chase the auroras and starlit scenes.
When you’re mapping out your route, think about the South Coast. Its black sand beaches, waterfalls, and glaciers just look unreal under the moon. Lots of photographers swear by guided tours, since local experts know the best hidden spots and can help tweak your camera settings for night shooting. Icelandic weather? It’s famously fickle, so keeping your plans flexible lets you adapt if the skies suddenly shift.
Key Takeaways
- Target September through April for those long, dark nights and a better shot at the Northern Lights
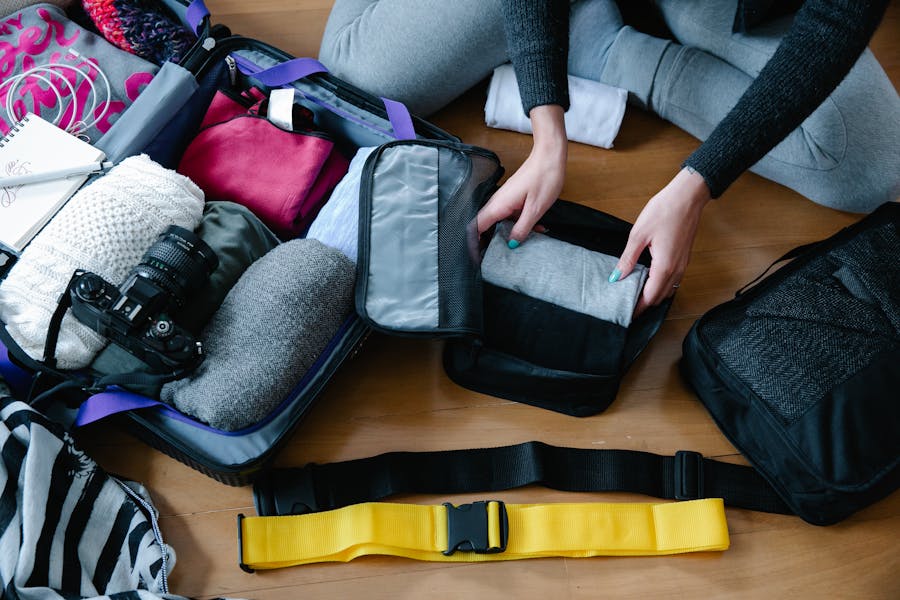
- Pack essentials: a sturdy tripod, remote shutter release, and extra batteries that can handle the cold
- Maybe book a specialized photography tour if you want expert advice on Iceland’s unique conditions
Choosing the Best Time for Night Photography in Iceland
Timing really is everything for night sky photography in Iceland. The season you choose will totally change the celestial wonders you’ll see—and the conditions you’ll have to deal with.
When to Visit for the Northern Lights
The Northern Lights, or Aurora Borealis, are the big draw for most night photographers. You can spot these dancing green lights from late August to mid-April, but your best odds are between September and March.
If you’re serious about catching the aurora, aim for the darkest months—November through February. Winter brings up to 19-20 hours of darkness, so you get loads of time to shoot.
You’ll want:
- Clear, cloudless skies
- High aurora activity (aurora forecast apps are a lifesaver)
- A new moon or as little moonlight as possible
- Locations far from city lights
A lot of folks prefer September/October or February/March to avoid the harshest cold but still get plenty of darkness. Iceland Air sometimes rolls out Northern Lights travel packages during these months.
Seasonal Weather and Light Conditions
If you come in summer (May-August), you’ll run into the famous midnight sun. Around late June, it’s basically daylight 24/7—so forget true night photography, but you can catch some wild sunset and sunrise colors that seem to last forever.
The shoulder seasons (April-May and September-October) feel a bit more balanced:
- 8-12 hours of darkness
- Temperatures that aren’t brutal (32-50°F/0-10°C)
- Milder weather
- Fewer crowds at the big photo spots
Winter brings these surreal light conditions, with the sun barely rising and the “blue hour” stretching on for hours. It’s a photographer’s dream for moody, mystical landscapes.
Navigating Winter Travel
Winter in Iceland is no joke if you’re a photographer. You’ll only get about 4-5 hours of daylight in December and January, so you’ve got to plan your shoots with military precision.
Roads can get sketchy fast. Here’s what helps:
- Rent a 4×4 with winter tires
- Check road.is every day for updates
- Stay close to your main photo locations
- Bring extra batteries (the cold zaps them)
- Crampons are a must for icy ground
Weather can flip on a dime—seriously, it’s wild. Always have a backup plan for indoor activities if a storm blows in. Many folks opt for guided tours in winter; it’s safer and you get more chances to shoot.
But honestly, winter is when Iceland looks its most dramatic. Snowy mountains, frozen waterfalls, and the Northern Lights overhead—hard to beat that.
Planning Your Route and Destinations

Iceland’s landscapes are just begging to be photographed at night. If you plan your route well, you’ll squeeze the most out of your trip and hit all those epic spots.
Mapping Iconic Icelandic Locations
First, figure out how many days you’ve got. The Ring Road (Route 1) loops the whole island and takes about 7-10 days if you want to do it justice. If you’re short on time, stick to the southwest or south coast.
Reykjavik is a solid starting point, especially for beginners. You can do day trips from the city and still have creature comforts at night. Most photographers rent their own cars for flexibility—4WD is pretty much essential in winter.
Seasons matter a lot. Summer gives you the midnight sun (May-July), so not much darkness but easy driving. Winter flips that: long nights, auroras, but trickier roads.
Download offline maps ahead of time and pin your must-shoot spots. Cell service can disappear in the middle of nowhere.
Highlights on the Golden Circle
The Golden Circle is about 190 miles and you could drive it in a day, but stretching it to 2-3 days is way better for night photography. This route hits three classic spots.
Þingvellir National Park sits right on a tectonic plate boundary. The rift valley is super dramatic under moonlight or aurora. If you stick around after sunset, you’ll have the place to yourself.
Geysir Geothermal Area gives you the chance to catch Strokkur geyser erupting against the stars. It goes off every 5-10 minutes, so you’ll get plenty of tries.
Gullfoss Waterfall is just magical at night. In winter, the icy sections glow in the moonlight. If you’re there in summer, try catching the low midnight sun lighting up the falls.
Exploring South Coast: Vik and Beyond
The South Coast, from Reykjavik to Jökulsárlón Glacier Lagoon, is just packed with iconic landscapes. Give yourself at least 3-4 days to really explore it after dark.
Seljalandsfoss and Skógafoss waterfalls often get lit up at night during peak season. Waterproof your gear—you’ll get drenched. If you want something different, walk behind Seljalandsfoss for epic night shots.
The black sand beaches near Vik have wild sea stacks and basalt columns. Reynisfjara Beach turns magical under starlight or at twilight. But seriously, watch out for sneaker waves—they’re no joke.
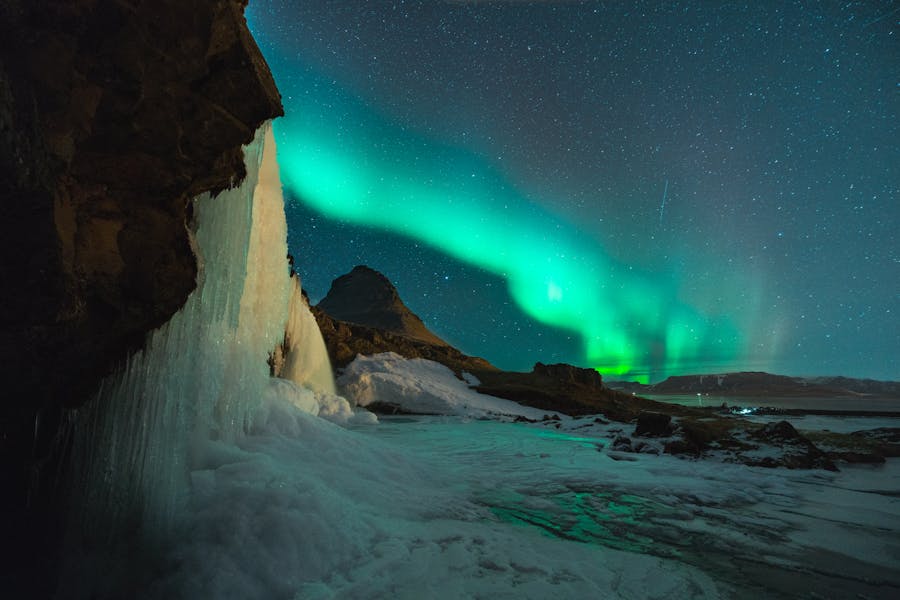
Go further east and you’ll hit Diamond Beach and Jökulsárlón Glacier Lagoon. Ice chunks on the shore glisten under moonlight, and the lagoon can reflect the Northern Lights if you’re lucky.
If you’re feeling ambitious, head to Vatnajökull National Park to shoot Europe’s largest glacier under the stars or aurora. Glacier caves are only accessible with certified guides in winter.
Securing Accommodation and Local Services
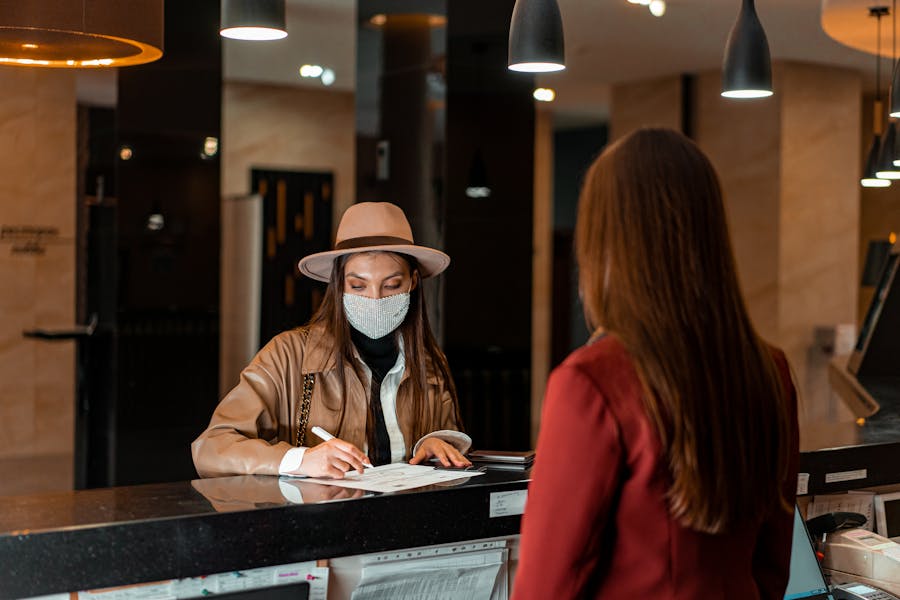
You’ll want to sort out where to stay and how to get around well before you land in Iceland. Trust me, these details make all the difference when you’re chasing the aurora at 2 a.m.
Choosing Lodging Near Photo Spots
Location is everything. Aim for places away from city lights but still close to your main shooting locations. Small guesthouses and rural hotels in Vik, Höfn, or around Kirkjufell are usually your best bet.
I’ve found that vacation rentals work great for photographers. You can come and go at weird hours and not worry about bugging other guests. Some hosts even give you a heads up if the aurora shows up!
Look for places with north-facing windows or outdoor areas for setting up your gear. Some hotels run “aurora alarms” for guests—super handy. In peak season (September-March), book your room 6-8 months out.
Blackout curtains are a lifesaver if you need to sleep during the day after a long night of shooting. If you can get a kitchenette, even better—you’ll be glad when you’re hungry at odd hours.
Transportation and Car Rentals
You pretty much need your own wheels for night photography in Iceland. Go for a 4WD with decent clearance, especially if it’s winter. Being able to chase clear skies or sudden aurora forecasts is worth every penny.
Check flight and car rental search services to score the best deals. Unlimited mileage is a must—you’ll drive more than you think.
Always pack emergency supplies: extra blankets, snacks, water, and a fully charged phone. Icelandic weather can turn on you fast, so safety first.
If you’d rather not drive, guided tours with local drivers are a solid option. They know the backroads and can get you to hidden gems while you focus on your camera. It’s pricier, but less stressful—especially if you’re traveling solo.
Some guesthouses will even pick you up from photo spots. If you find one that caters to photographers, that’s a huge bonus during aurora season.
Essential Gear for Night Photography
You’ll need the right gear to nail those Iceland night shots. The cold, the wind, the low light—it’s a lot, but with the right setup you’re golden.
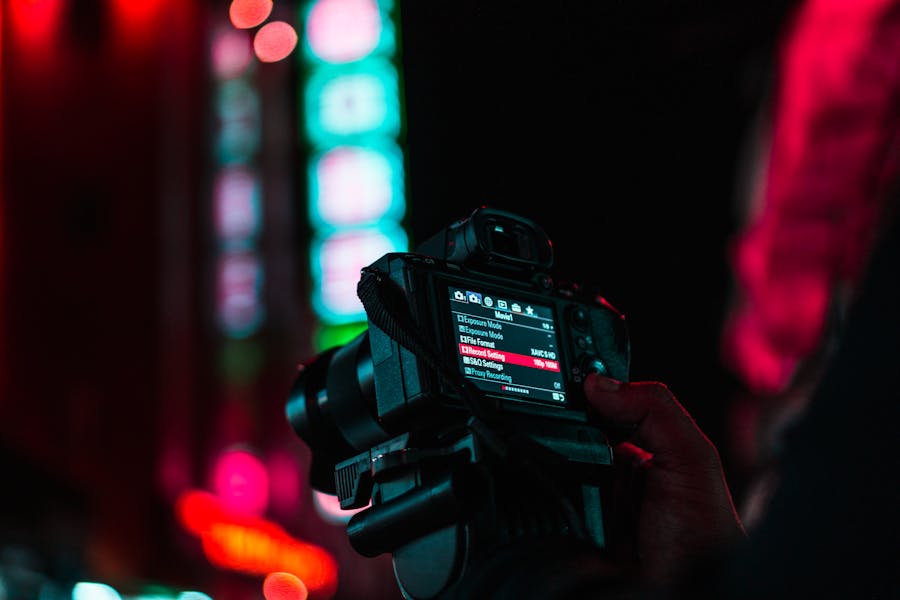
Must-Have Camera Equipment
A full-frame digital camera really makes a difference for night photography in Iceland. Bigger sensors handle low light better, so you get more detail in those dark scenes. The Canon 5D and similar full-frame DSLRs or mirrorless cameras are solid picks for auroras and star shots.
Manual mode is a must—you want total control over your settings. Good high ISO performance matters too, since you’ll often be shooting between ISO 1600-3200 for auroras.
Don’t forget spare batteries! The cold drains them fast, especially with long exposures. I usually keep extras in an inside pocket to keep them warm.
A remote shutter release is key to avoid camera shake during those long exposures.
Selecting the Right Lenses
Wide-angle lenses are basically non-negotiable here. You want to capture as much of the sky and landscape as possible. Something in the 14-24mm range is perfect for auroras, letting you frame both the lights and a dramatic foreground.
Fast lenses with wide apertures (f/2.8 or wider) are super helpful. The wider the aperture, the more light you get, which means faster shutter speeds and lower ISO—so your shots stay crisp and clean.
Prime lenses like a 24mm f/1.4 are fantastic for night work. They’re usually sharper and faster than zooms, and they’re a favorite among travel photographers braving Iceland’s wild lighting.
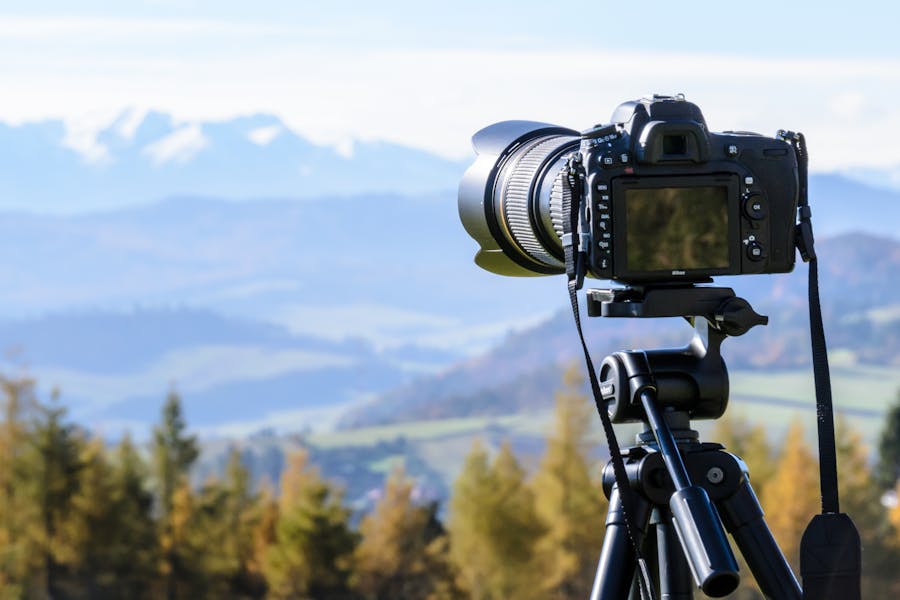
Stabilization Tools: Tripods and Monopods
You can’t really do night photography without a sturdy tripod. When you’re shooting 10-30 second exposures for auroras, even a tiny shake will ruin your shot. Carbon fiber tripods hit the sweet spot between weight and strength.
In Iceland’s wind, a heavier tripod actually helps. Some people hang their camera bag from the center column for extra stability. Adjustable legs are a must for uneven ground.
Monopods aren’t as stable, but they double as walking sticks and can help if you’re moving around a lot. Not a replacement for a tripod, but handy in a pinch.
A good ball head that locks tight will keep your camera from drifting during those long exposures. Don’t skimp on that.
Understanding Icelandic Night Landscapes
Iceland’s night landscapes honestly feel like another planet. The darkness brings out details and moods you’ll never see in daylight, turning familiar spots into something totally new.
Capturing Northern Lights Landscapes
The aurora borealis swirling over Iceland’s night sky is just about the dream shot for any photographer. To get the best results, head far away from city lights—Thingvellir National Park or the black sand beaches of Vik are both incredible.
Use a wide-angle lens to grab both the aurora and the landscape. Manual mode is your friend: ISO 800-3200, aperture f/2.8-4, shutter speed between 5-20 seconds (depends on how wild the lights are moving).
Foregrounds matter. Mountains, glaciers, or reflections in water add depth and give your photos that classic Icelandic feel.
Oh, and bundle up! Chasing the Northern Lights means standing still in freezing cold for ages. Bring more layers than you think you need.
Photographing Waterfalls After Dark
Iceland’s waterfalls get downright magical once the sun dips below the horizon. When you use long exposures, the water turns silky and almost surreal against those shadowy cliffs.
You’ll want to pack a sturdy tripod—honestly, it’s non-negotiable. Throw in a remote shutter release, waterproof gear (trust me, you’ll get drenched), and a headlamp with a red light option.
For settings, I usually start with ISO 400-800, aperture around f/8-11, and exposures between 10-30 seconds. That combo lets you catch the water’s movement but still keeps the rocks and mossy banks sharp.
Some spots like Seljalandsfoss get lit up at night, which is wild for photos. Other falls stay dark, so you might need to get creative and light-paint with a flashlight. Either way, the contrast between the moving water and the dark sky looks dreamy—honestly, you just can’t get the same vibe in daylight.
Booking Guided Photography Tours and Workshops
If you sign up for a dedicated photography tour in Iceland, it can completely change your night shooting experience. These tours offer expert guides, rides to the best spots, and hands-on help when your camera settings go sideways.
Benefits of Joining a Photography Workshop
Photography workshops in Iceland are pretty fantastic for both newbies and seasoned shooters. You’ll get local guides who know exactly where and when to catch the northern lights or that soft midnight sun glow.
Most tours handle transportation, which is a lifesaver—navigating icy, unfamiliar roads in the dark isn’t for the faint of heart.
Workshop leaders share all sorts of tricks about camera settings, composition, and editing that are specific to Iceland’s wild light. Shooting with a group of fellow photo nerds is also a blast. Sometimes you end up making friends for life or even planning future trips together.
Recommended Night Photography Tours
Iceland has some killer night photography tours. Iceland Photo Tours really stands out—they’ve got expert-led workshops and always seem to know the best places to set up.
A lot of these tours throw in thoughtful extras like warm jumpsuits, outdoor chairs, and Icelandic snacks so you don’t freeze or go hungry during those long shoots. Some even bring spare tripods and gear if you need them.
If you’re visiting in summer, look for workshops that take advantage of the midnight sun. Chris Byrne Fine Art, for example, runs summer tours where you shoot through the night and rest during the day.
Definitely book early, especially if you’re looking at 2025-2026 trips. The best workshops fill up fast, and small-group tours with more personalized instruction usually sell out first.
Travel Tips and Safety for Night Explorations
Shooting Iceland’s landscapes at night takes a bit of planning, both for your safety and to make sure you get those jaw-dropping shots. The remoteness and unpredictable weather can catch you off guard if you aren’t ready.
Staying Safe in Remote Locations
Always let someone know your plans before heading out for night photography. Iceland’s terrain can get sketchy after dark, and cell service drops off in a lot of places. Download offline maps and bring a portable charger for your phone.
I really recommend going with a buddy if you can. If you’re flying solo, maybe join a photography tour that specializes in night shoots.
Pack a headlamp (plus extra batteries) and something reflective so others can spot you. Some folks even bring a personal locator beacon, just in case.
Watch out for slippery rocks near waterfalls or unstable ground. Stick to marked paths—trust me, wandering off in the dark is never a good idea.
Weather Preparedness and Clothing
Iceland’s weather is famously fickle, especially at night. Check the forecast before you head out, and don’t be afraid to bail if things look dicey. People here always say, “If you don’t like the weather, wait five minutes.” It’s true.
Dress in layers: start with moisture-wicking base layers, add something warm in the middle, and top it off with waterproof and windproof shells. I always stash an extra pair of gloves because your fingers freeze fast when you’re fiddling with camera gear.
Don’t forget waterproof boots with good grip and thick socks. Hand warmers are a game-changer when you’re stuck standing still during long exposures.
Consider travel insurance that covers emergency evacuation. Medical help in remote spots gets expensive fast, and having coverage lets you focus on the aurora, not your worries.
Frequently Asked Questions
Night photography in Iceland is both challenging and incredibly rewarding. Here are some common questions I get, along with tips to help you make the most of your trip.
What equipment should I bring for a night photography tour in Iceland?
You’ll absolutely need a sturdy tripod—those Icelandic winds are no joke, and lightweight gear won’t cut it.
Your camera should let you shoot in manual mode and handle high ISO pretty well. Full-frame cameras are great for low light, but honestly, any camera with manual controls will get you started.
Wide-angle lenses with fast apertures (f/2.8 or wider) are best for those big, sweeping night shots. Something in the 14-24mm or 16-35mm range works well.
Bring way more batteries than you think you’ll need. The cold drains them fast, and it’s always better to have extras.
What are the top locations for night photography in Iceland?
Jökulsárlón Glacier Lagoon is a dream for shooting ice against the aurora or a starry sky. The nearby black sand beaches make for some pretty dramatic contrasts.
Kirkjufell mountain on the Snæfellsnes Peninsula is iconic—its shape just begs to be in your aurora photos.
The black sand beaches near Vik have barely any light pollution and those wild sea stacks that look amazing silhouetted at night.
Thingvellir National Park is another favorite. It’s both historically significant and offers crystal-clear skies away from city lights.
How can I capture the Northern Lights during my Iceland photography tour?
Keep an eye on aurora forecasts with apps like “My Aurora Forecast” or check out vedur.is for updates from the Icelandic Met Office.
Use a wide aperture (f/2.8 or wider), set your ISO around 800-3200, and try shutter speeds between 5-15 seconds depending on how fast the aurora is moving.
Manually focus on a distant light or star before the aurora shows up. Autofocus usually struggles in the dark, so set it to infinity and tweak as needed.
Try to include something interesting in the foreground—ice, mountains, whatever tells a story about Iceland.
Are there specialized guides for night photography tours in Iceland?
Absolutely! Plenty of companies offer night photography tours led by locals who know all the best spots and when to hit them.
These guides keep tabs on the weather and aurora activity, giving you a much better shot at getting killer photos. They’ll even help out with camera settings if you’re still learning.
Local pros like Skarpi (Skarphedinn Thrainsson) run multi-day tours with night shoots. Expect to pay around $5900 for an 11-day trip.
Small groups are the way to go if you want more one-on-one help with your camera and technique.
What’s the best way to prepare for unpredictable weather during night photography in Iceland?
Layer up—moisture-wicking base, something warm in the middle, and a waterproof shell on top. You’ll be standing still for ages, so dress warmer than you think you need.
Bring weatherproof covers for your camera and plenty of lens cleaning gear. Mist and spray can fog up your lens in no time.
Keep microfiber cloths in a ziplock so they stay dry until you need them. Hand warmers can even help keep your lens from fogging up.
Always have a backup plan for locations. If your first choice is a washout, know a few alternatives that might be more sheltered.
Can you recommend any night photography workshops for beginners in Iceland?
A bunch of photography tour companies actually run workshops just for beginners. They usually mix daytime lessons with night shoots, which is pretty handy if you want the full experience.
If you can, try to find workshops that keep the group size small. That way, you’ll get more personal feedback instead of feeling lost in the crowd.
Some photography schools right in Reykjavik sometimes put on weekend workshops. These are often easier on your wallet than those long, pricey tours, but you still get solid advice from pros.
Now and then, you’ll spot pop-up workshops online from photographers visiting Iceland. Those can be a fun way to pick up some unique tricks you won’t hear everywhere else.
Leave a Reply